Have you ever generated the perfect image…until you noticed a sixth finger or that phantom hand? Have you ever loved the style or composition of a image, but just wanted to change a few small details? Save those images! Let’s walk through how to perfect your Midjourney images. The options we will discuss are: Upscale, Variation, Remix, Pan and Zoom.
Upscale
After generating a new group of images you will see buttons underneath the group U1, U2, U3, and U4. These buttons correspond to the top-left, top-right, bottom-left, and bottom-right images respectively. In older versions of Midjourney, the Upscale button increased resolution and sharpened the images. In version 5 and above (5.2 at the time of writing) all images are upscaled by default. The upscale button separates the image from the grid and unlocks additional options. See more about legacy upscaling here. For most purposes, all you need to know is that the upscale button unlocks the extra options for the image you select.
Variation
The magic starts here! After generating a new group of images, you will see buttons underneath ( V1, V2, V3, and V4). These buttons will allow you to choose an image and create a new panel of images close to the style of the image you picked. There are 3 types of variation: vary (subtle), vary (strong), and vary (region). The initial variation buttons (V1, etc) only allow you to use low variation mode or high variation mode according to your settings. Type /settings to view and change your defaults. To unlock the full range of variation, upscale one of your images.
Vary (Subtle)
The vary (subtle) button does as it says and makes slight changes to the image while keeping the overall style and composition. If there are a few small details that you don’t like, try using vary (subtle) to fix them. Use vary (subtle) whenever you like the style but aren’t particular about the details.
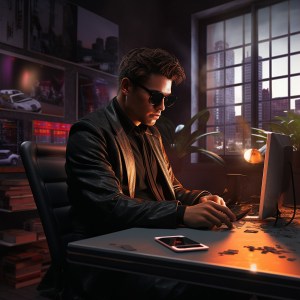
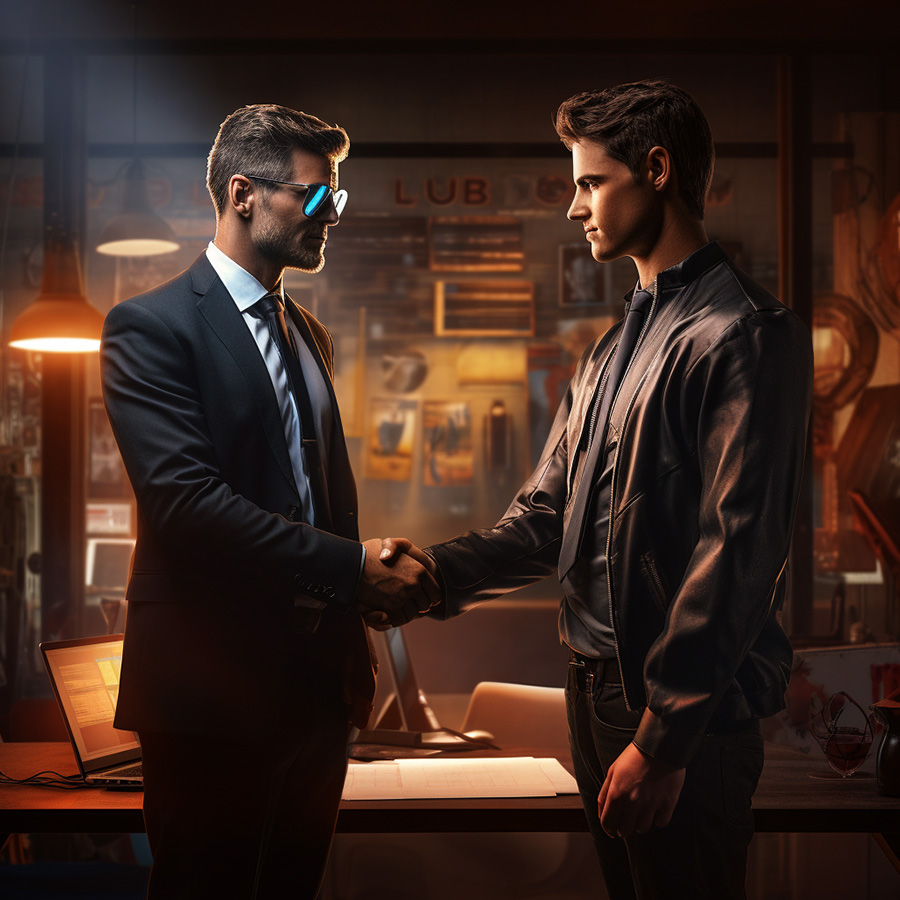
Vary (Strong)
The vary (strong) button allows you to make major composition changes while maintaining the style of the image. Let’s say we generated a stylized picture of an office worker, and Midjourney gives us a man sitting at a desk. The style is great, but we want him to be standing. Using vary (strong) will maintain the style but change the composition. At this point, I will note that you should enable remix from your settings menu. Instead of having Midjourney randomly change your composition, remix allows you to change your prompt to reflect what you want to see. More on remix later.
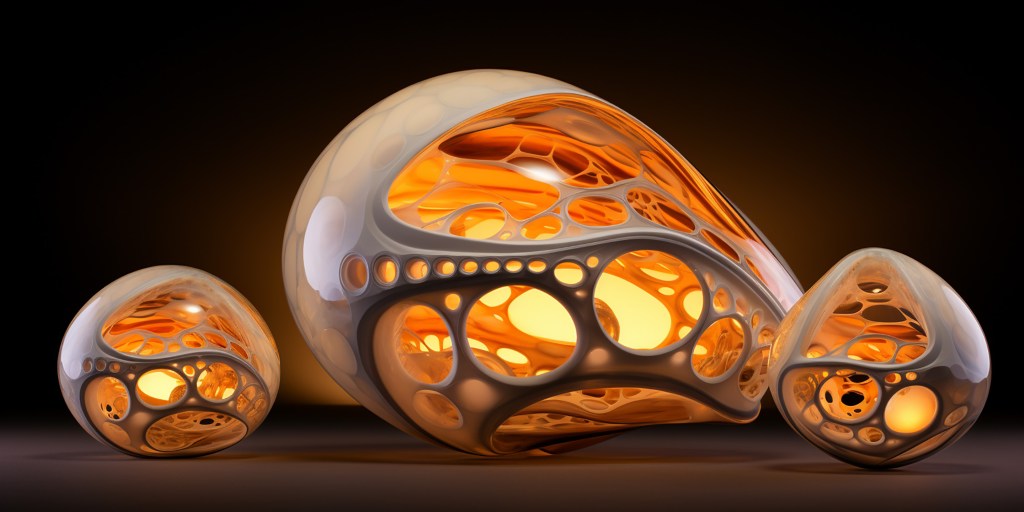
Vary (Region)
The vary (region) button allows you to change a particular area of a picture while leaving the rest untouched. When using the vary (region) button you will be presented with a new pop-up window that allows you to select a portion of the image to change. You can use either the lasso or the marquee (box) to make your selection.
When you press continue Midjourney will regenerate only the chosen section according to your prompt. Often you can just leave the prompt the same, at other times you will need to drastically change your prompt to get what you want. Midjourney typically does a great job blending the new and old sections. Keep in mind that this isn’t a perfect tool and sometimes its very difficult to get what you want.
Remix/Redo
Remix isn’t a modification feature. It’s a setting that offers additional flexibility to the other modification features. It allows you to change your prompt every time you use vary, pan, zoom, or the redo button. Type /settings to turn remix on or off. Personally, I leave it on. If you don’t wish to make modifications, simply continue without changing the prompt.
Let’s talk about redo for a moment. I’m sure you noticed the redo button along with the vary and upscale buttons. If you don’t like the image you got, simply redo. Right? Well, if you have remix enabled you can make slight changes to your prompt to get a better result. Using remix at this stage saves you a bit of work on the back end.
Pan
Pan becomes available after upscaling an image. It is important to note that you can only pan in 2 directions at a time, left and right or up and down. Let’s say we create an image of a tree (let’s also assume remix is enabled). How about we show a cutaway of the ground that exposes the roots of the tree and a subterranean environment? Press the pan (down) button and change the prompt. Now we have a new panel of images. We can upscale an image to continue panning. We can pan up if we like but, the pan left and right are not available. If you wanted to use this picture as a starting point to pan left and right, you could use one of the zoom options and then begin panning in a different direction after you upscale. Please note, that zooming will reduce the pixel count. As long as you continue panning and don’t use zoom you can continue to increase the pixel count of the image. This tool is perfect for creating very long or tall (panning) images.
Pan is a very interesting feature. It allows you to expand your image in the direction of your choice without affecting the original image. It is the only modification feature that increases the pixel count of the image every time you use it. Pan increases the horizontal pixel count by 512 (if you panned horizontally) and maintains the vertical pixel count. The same happens if you chose to pan vertically. The only other way to increase pixel count is by utilizing aspect ratio options/zoom, more on that later. >Pan allows you to increase the image resolution beyond the maximum 1024px x 1024px dimensions in one direction. –midjourney documentation
Pan becomes available after upscaling an image. It is important to note that you can only pan in 2 directions at a time, left and right or up and down. Let’s say we create an image of a tree (let’s also assume remix is enabled). How about we show a cutaway of the ground that exposes the roots of the tree and a subterranean environment? Press the pan (down) button and change the prompt. Now we have a new panel of images. We can upscale an image to continue panning. We can pan up if we like but, the pan left and right are not available. If you wanted to use this picture as a starting point to pan left and right, you could use one of the zoom options and then begin panning in a different direction after you upscale. Please note, that zooming will reduce the pixel count. As long as you continue panning and don’t use zoom you can continue to increase the pixel count of the image. This tool is perfect for creating very long or tall (panning) images.
Please note: as of version 6, panning no longer increases the size of the image; it functions just like zoom and you can pan in any direction without limits.
Zoom
Zoom is another great feature. It allows you to add to your image by extending the canvas. (This will not increase pixel count, by itself) In a sense zoom is like an omni-directional pan. With remix enabled you can change your prompt, which allows for some flexibility. But you end up adding large sections to the image with little control as compared to pan or vary region options.
There are 4 ways to use zoom:
- Zoom 2x
- Zoom 1.5x
- Make Square
- Custom Zoom
Zoom 2x increases the relative image size by 2x (relative because zoom does not increase pixel count). It basically shrinks the original image by 50% and fills around it with new details. Zoom 1.5x works in the same fashion. Make square is useful if your image is not square and you want it to be. Two things to remember: the final output will be 1024×1024 pixels and this feature is not available on square images (for obvious reasons).
My favorite version of zoom is the custom zoom. When you use custom zoom you have the option to change your prompt (whether remix is enabled or not), change aspect ratio, and set “custom zoom.” The range for zoom is 1-2; you may use decimals. I most often use custom zoom to change the aspect ratio.
Have you ever created an image an then realized afterward that you need to change the aspect ratio? You may have tried using the redo function, if you have remix enabled you can specify a new aspect ratio. If you have tried this, you also know how bad it fails. Your picture will end up stretched or squashed and generally mangled. Custom zoom is the cure! Simply set your zoom to 1 and change your aspect ratio to whatever you want. Midjourney will leave the original picture untouched and fill in the details around it to match whatever aspect ratio you chose.

Additionally, if you have ever gotten those “black bars” on the top and bottom or left and right of a picture you can use custom zoom to fix it. Upscale the image you want to fix and choose custom zoom. Maintain the same aspect ratio and set zoom to 1. Midjourney will attempt to fill in those black areas. It doesn’t always work, but very often it does.
Finally, let’s talk about aspect ratio. By changing the aspect ratio you can increase the pixel count of the image beyond the normal square ratio. These pixel counts are preset and a 2:3 aspect ratio (for example) will always have the same pixel count. Meaning, if you resize an image with custom zoom you may lose pixel count. That being said, I have found that a 4:5 or 5:4 is one of the highest pixel counts you can obtain. One of the few ways to get more is with extremely long/tall images using the pan feature. For a more in depth discussion of pixel counts/resolution see this link.
Hopefully, this article helps you to understand how to make better Midjourney images. Maybe now you can recover some of the images that weren’t quite like you wanted. If you are a beginner check out the Setup Guide and the Discord Server Guide. If you need more help with prompting see this article: Midjourney Prompts. If you are interested in premade prompts, click here. Thanks for reading, stay tuned!

You must be logged in to post a comment.